
















Copyright: ©Author(s) 2026.
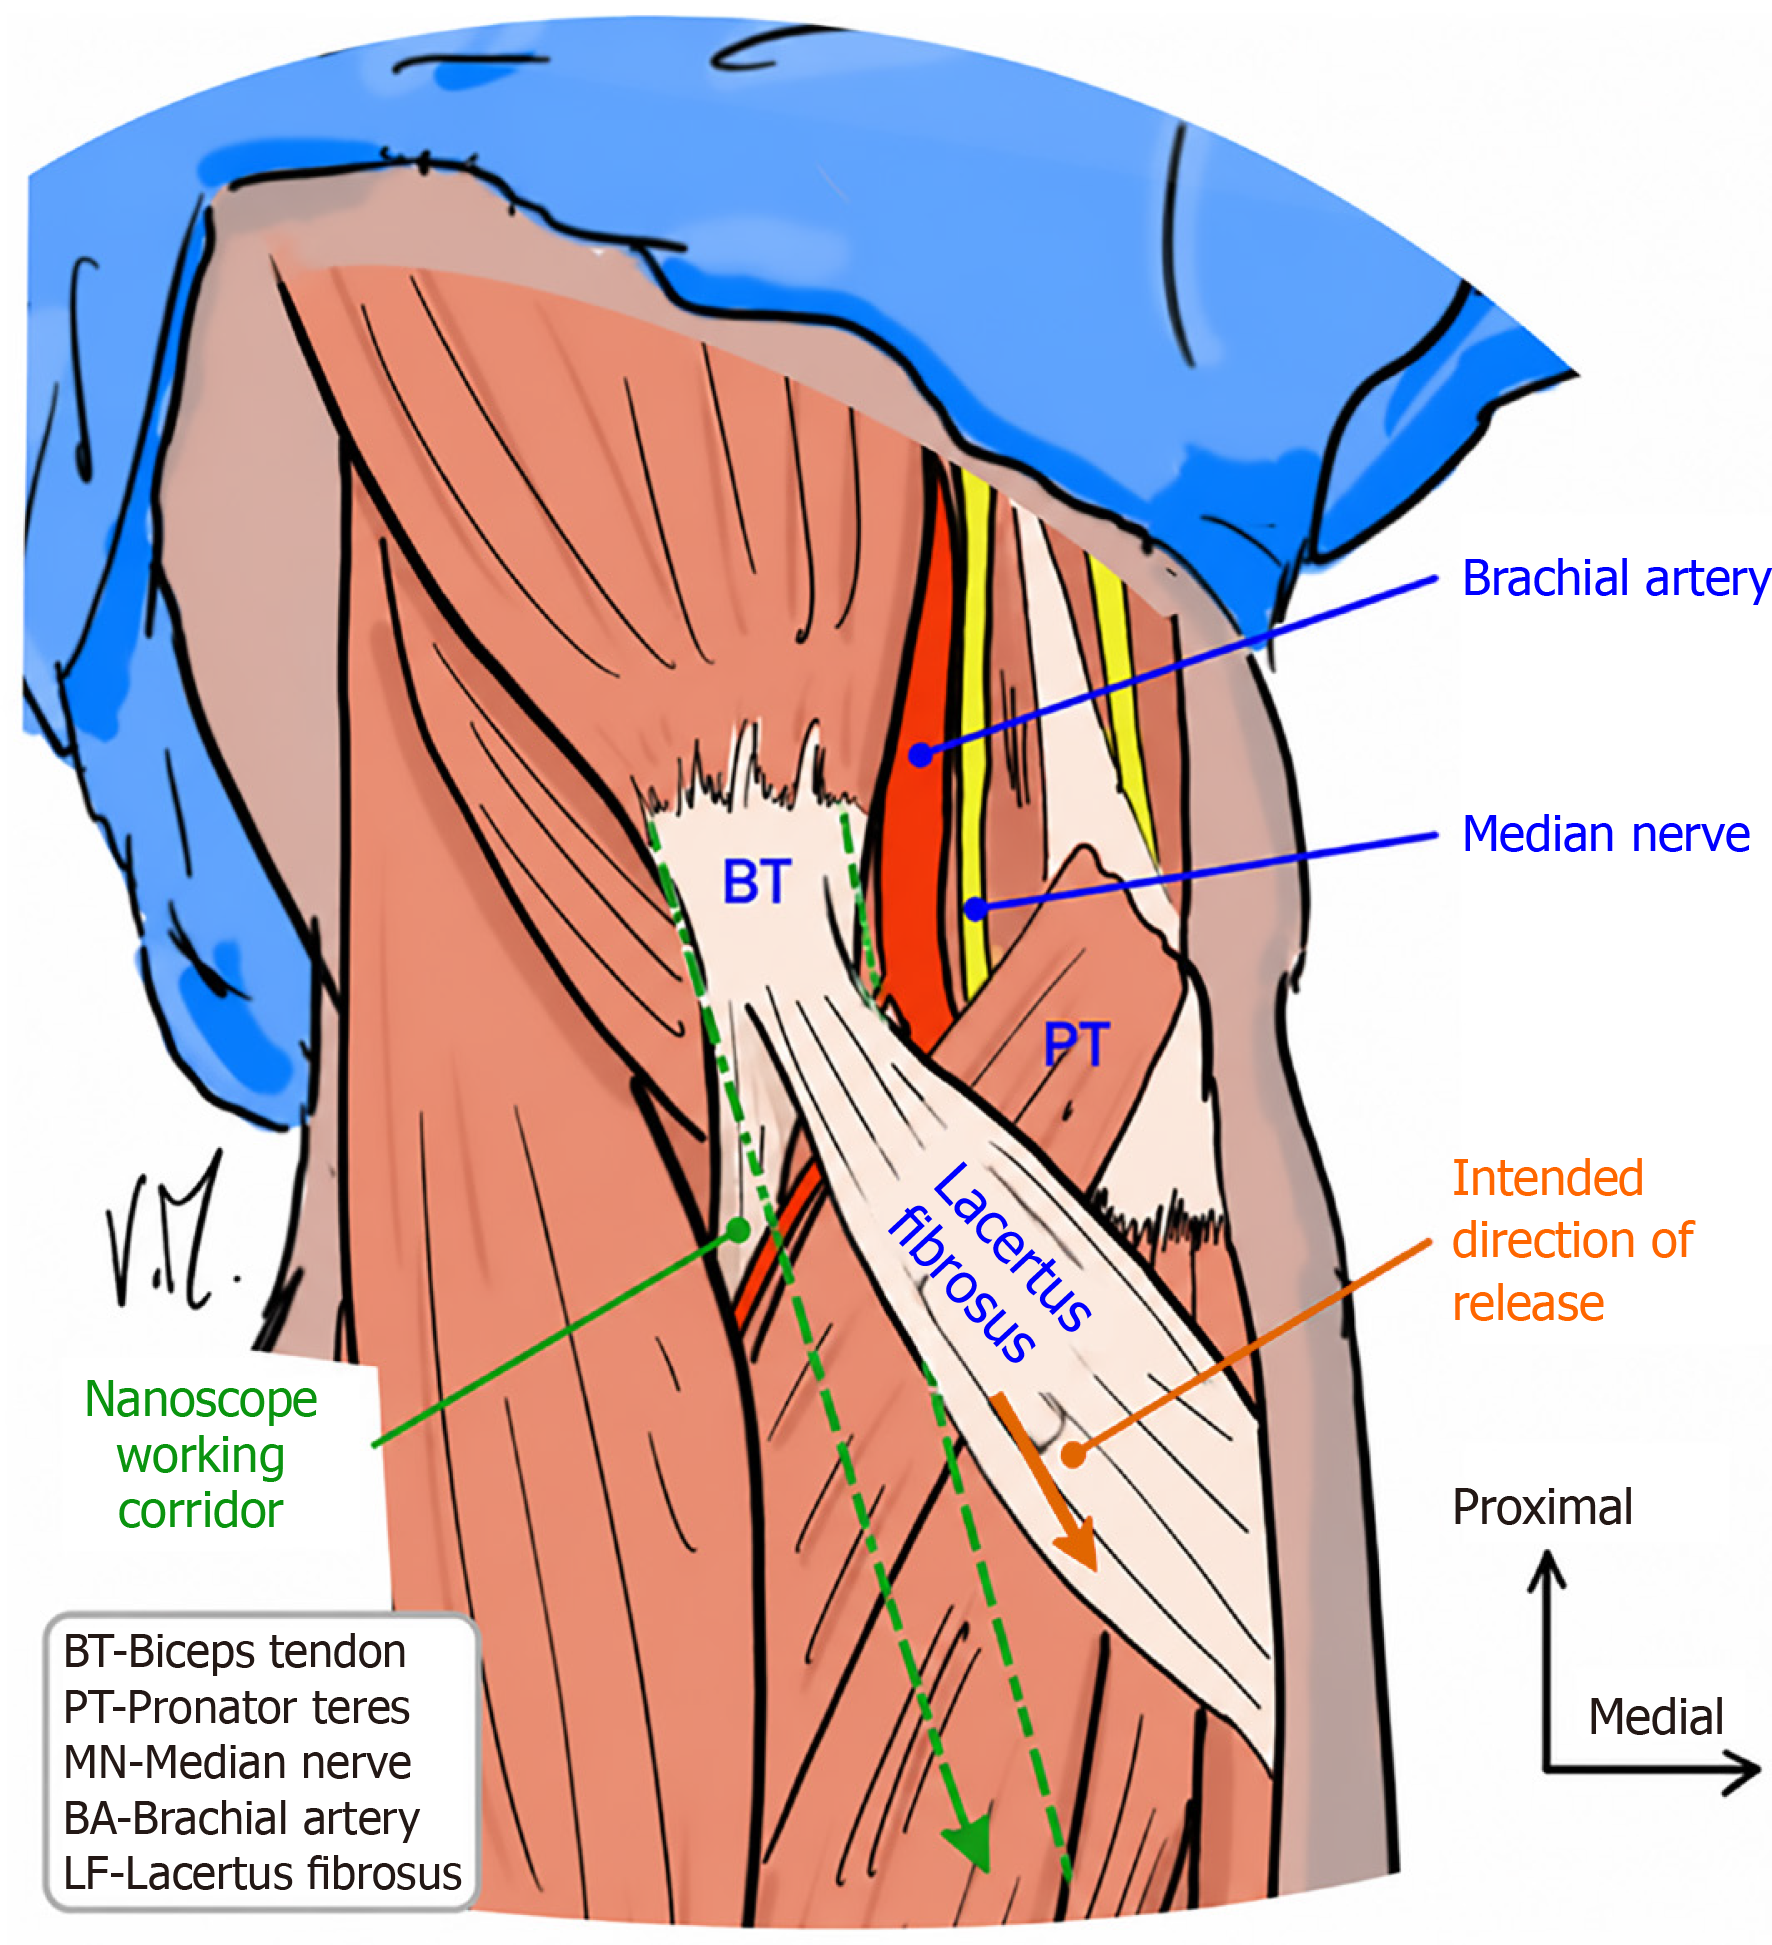
Figure 1 Schematic illustration of the proximal forearm anatomy demonstrating the anatomical relationship between the lacertus fibrosus, median nerve, brachial artery, and pronator teres.
The lacertus fibrosus is shown crossing superficially over the median nerve and adjacent vascular structures. BT: Biceps tendon; PT: Pronator teres; MN: Median nerve; BA: Brachial artery; LF: Lacertus fibrosus.
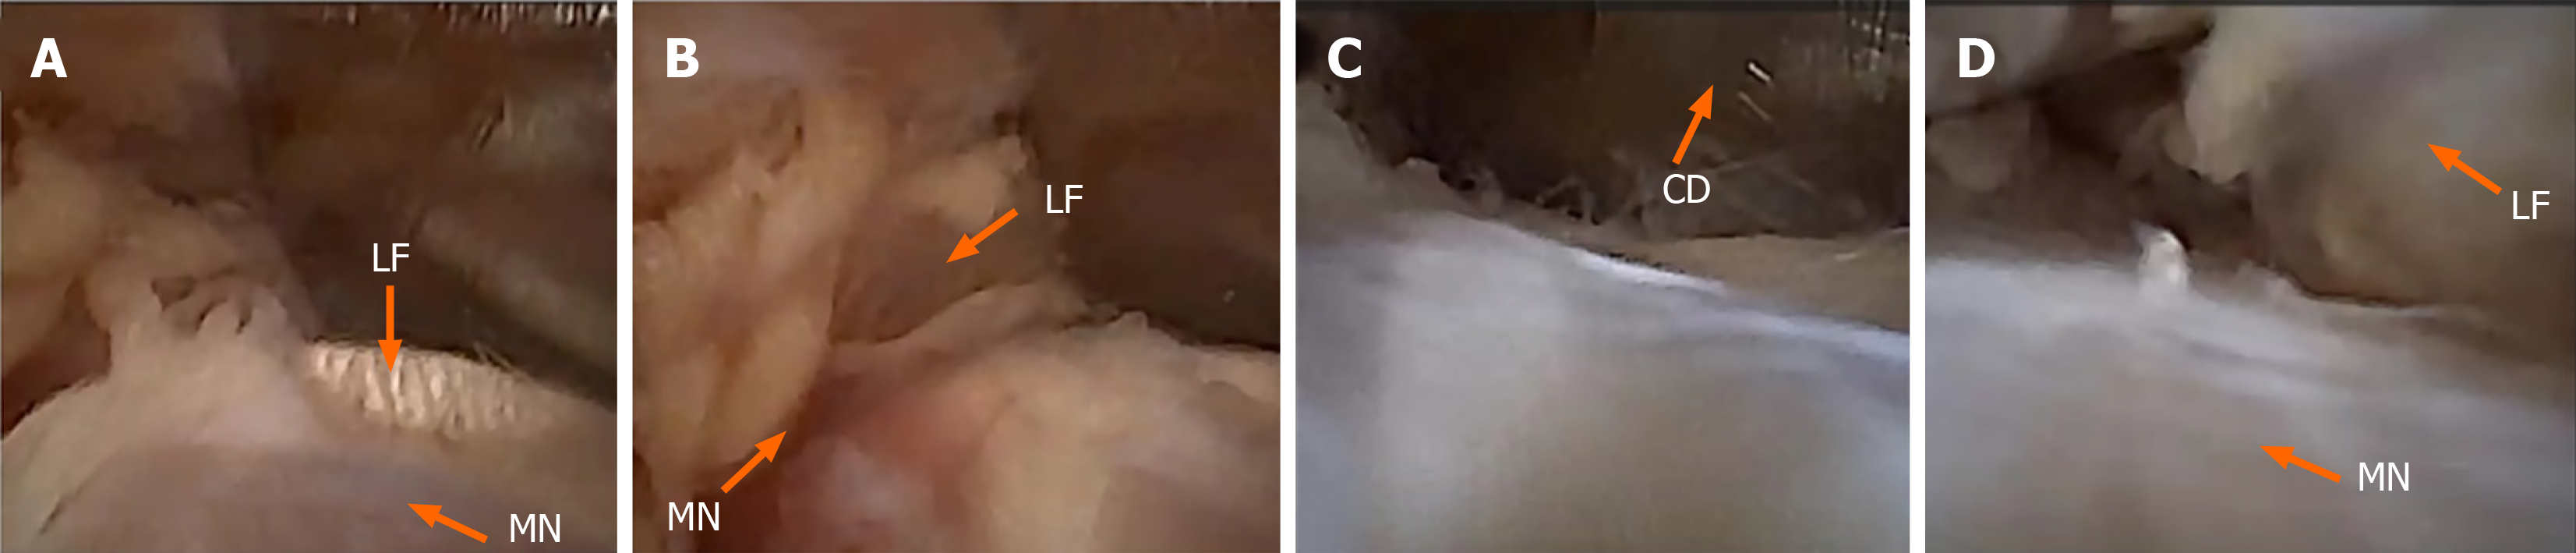
Figure 2 Sequential nanoscopic views during nanoscope-assisted lacertus fibrosus release.
A: Identification of the lacertus fibrosus and underlying median nerve; B: Development of the working corridor with visualization of the lacertus fibrosus and median nerve; C: Introduction of the cutting device under direct visualization; D: Final nanoscopic view following controlled division of the lacertus fibrosus, demonstrating the underlying median nerve. LF: Lacertus fibrosus; MN: Median nerve; CD: Cutting device.
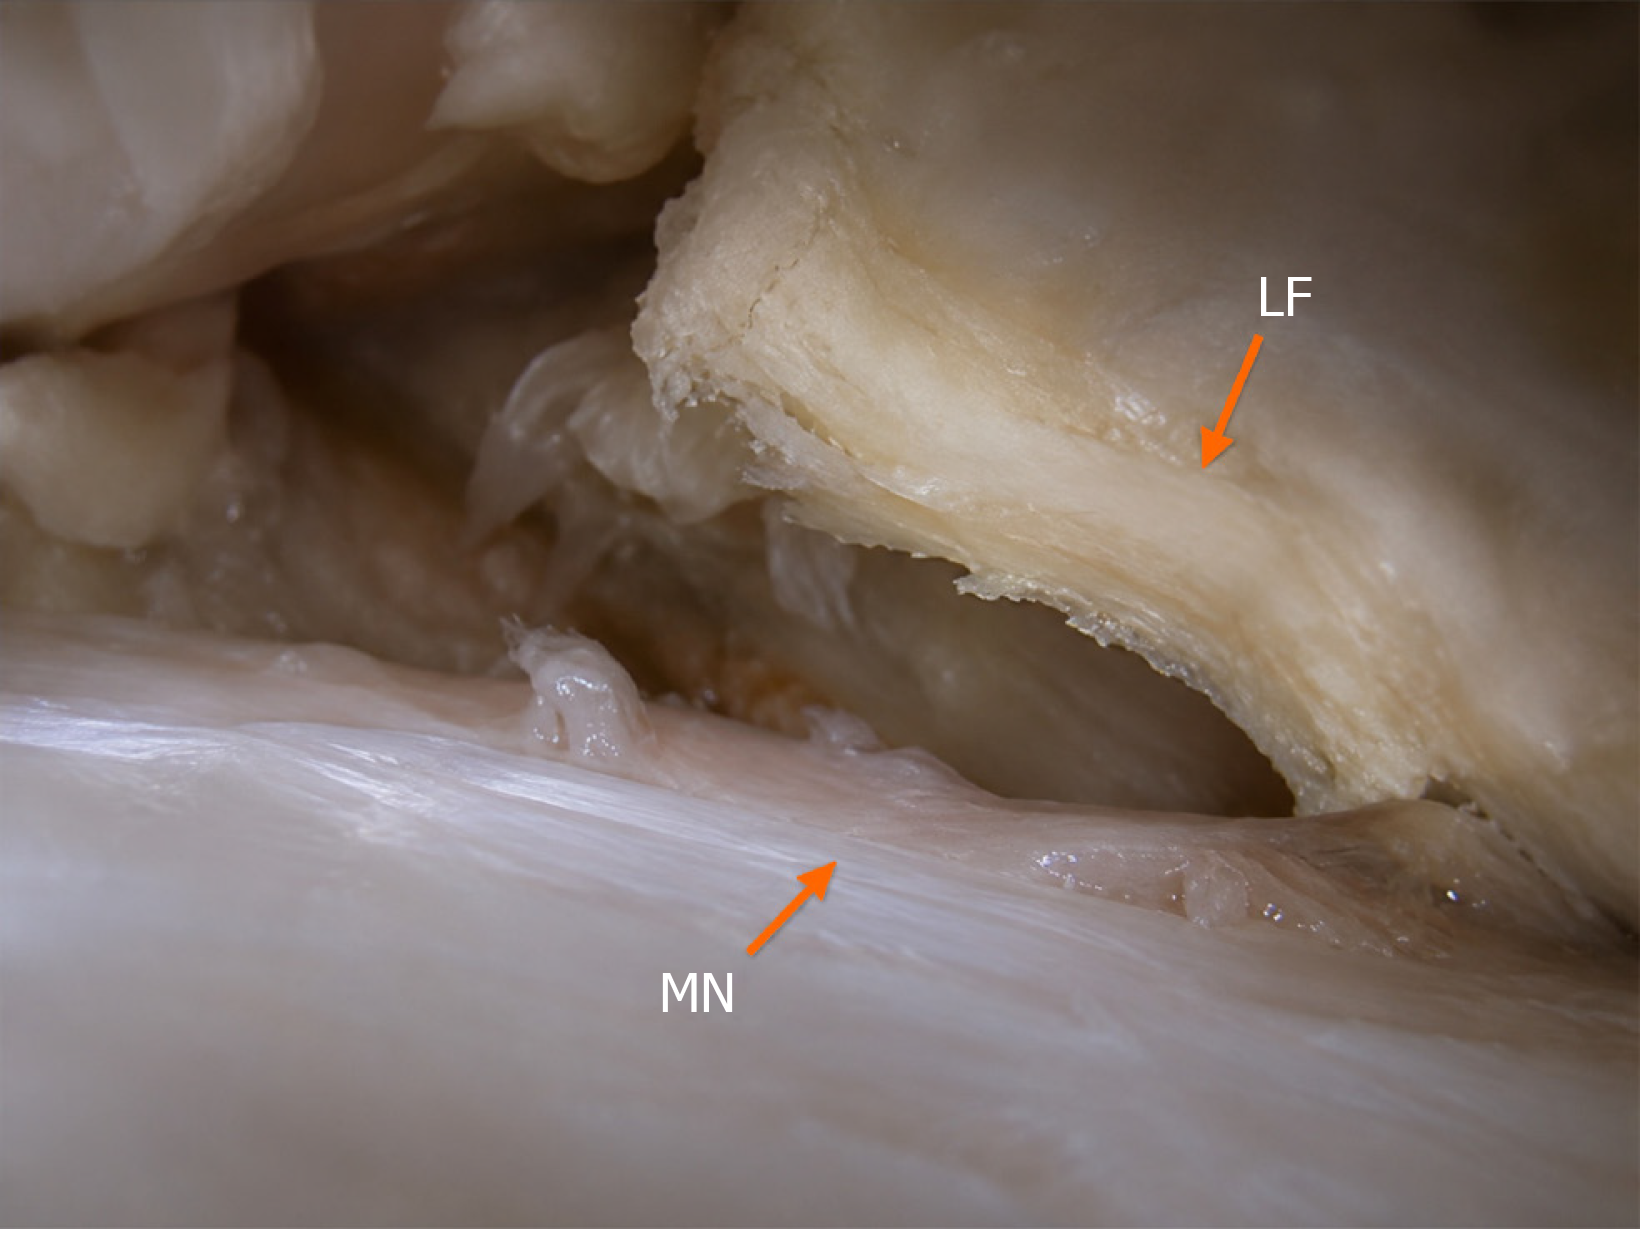
Figure 3 Final nanoscopic view following completion of lacertus fibrosus release, demonstrating the divided lacertus fibrosus and preserved continuity of the underlying median nerve.
LF: Lacertus fibrosus; MN: Median nerve.
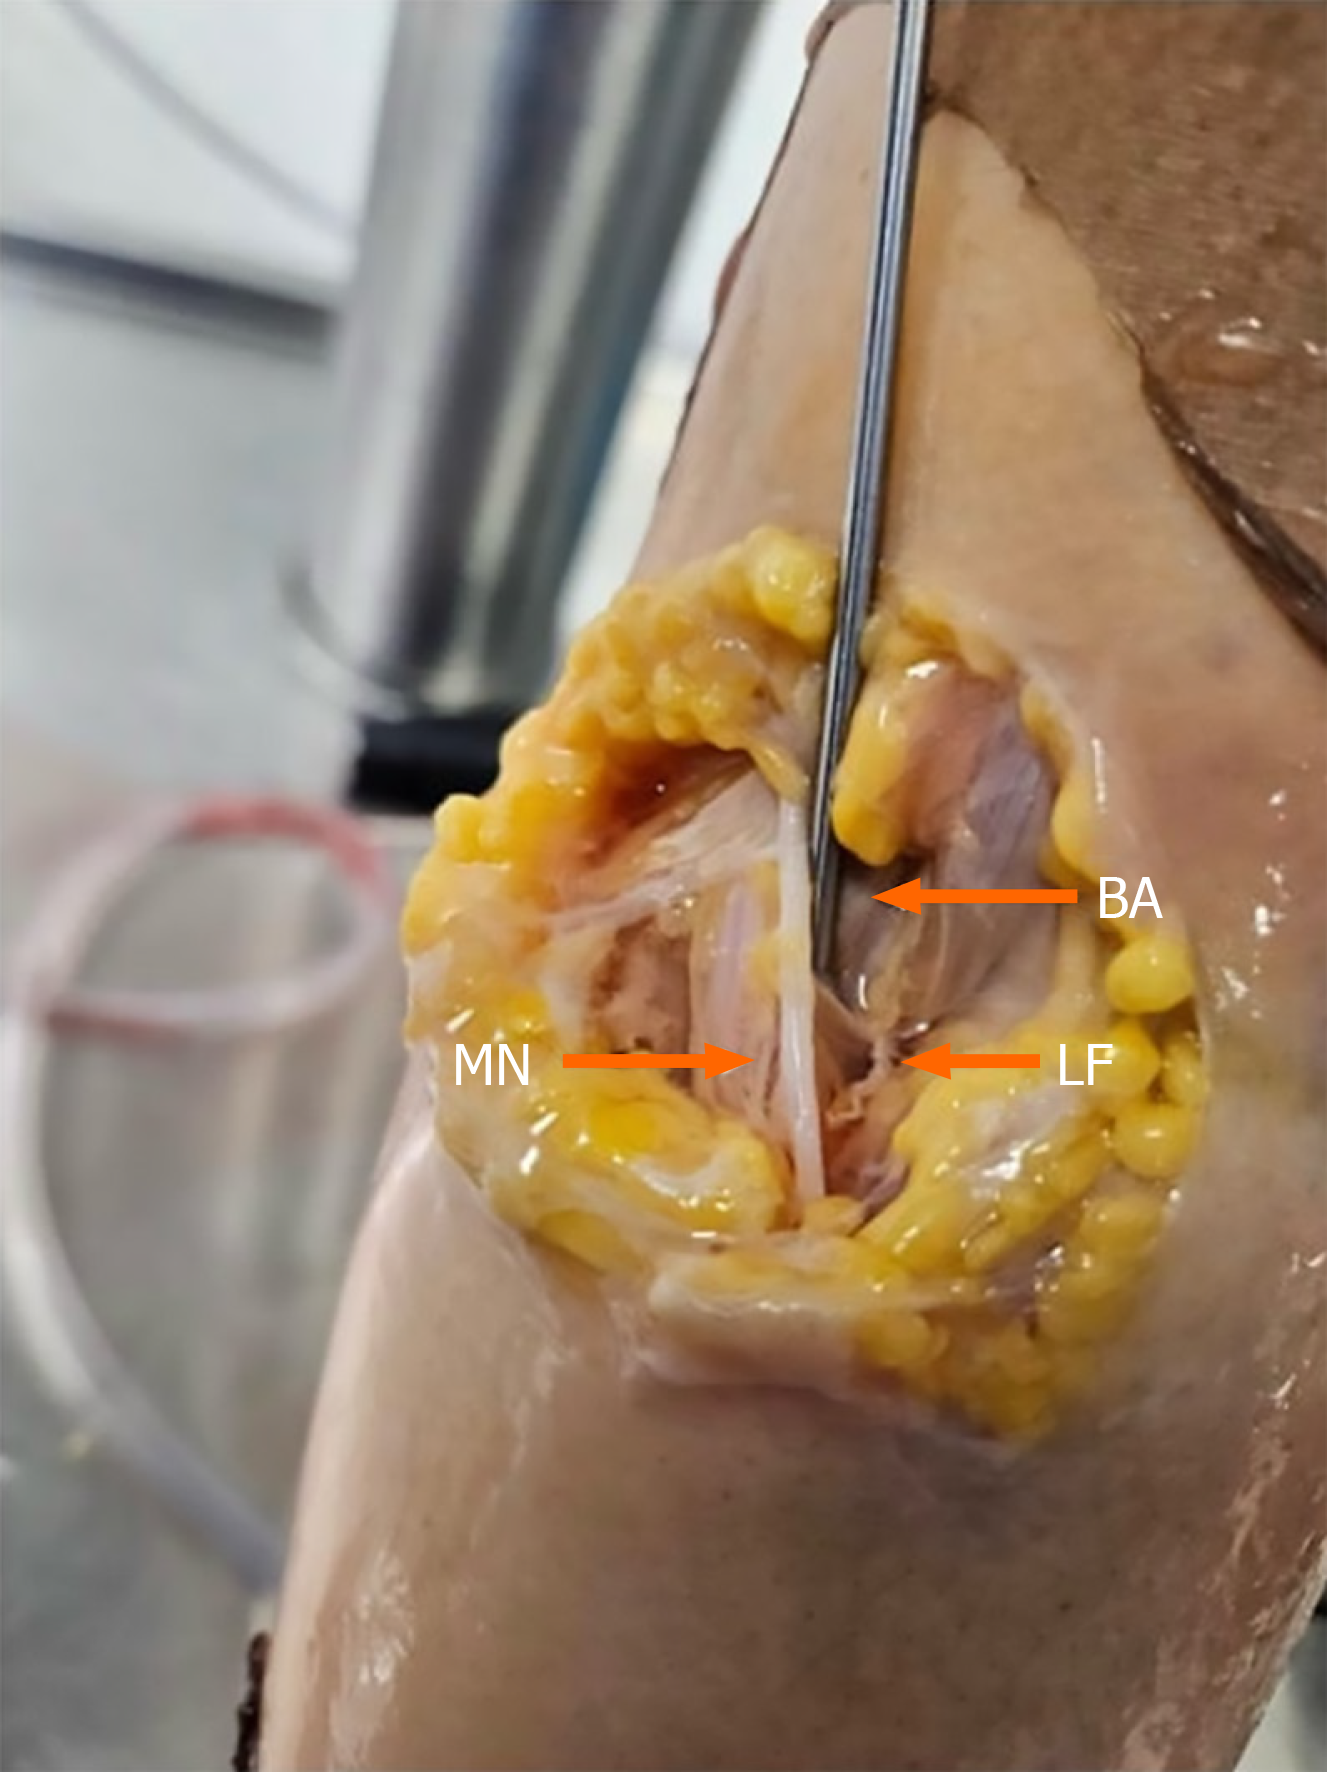
Figure 4 Post-procedural open anatomical validation following nanoscope-assisted lacertus fibrosus release.
The released lacertus fibrosus, decompressed median nerve, and preserved brachial artery are identified by orange arrows, confirming complete release and preservation of adjacent neurovascular structures. LF: Lacertus fibrosus; BA: Brachial artery; MN: Median nerve.
- Citation: Chlebanowski B, Wojtowicz BG, Urban K, Kanak M, Domzalski M, Lesman J. Nanoscope-assisted release of the lacertus fibrosus: A cadaveric study of feasibility, visualization, and anatomical safety. World J Orthop 2026; 17(8): 123794
- URL: https://www.wjgnet.com/2218-5836/full/v17/i8/123794.htm
- DOI: https://dx.doi.org/10.5312/wjo.123794