Copyright
©The Author(s) 2019.
World J Clin Cases. Dec 26, 2019; 7(24): 4208-4217
Published online Dec 26, 2019. doi: 10.12998/wjcc.v7.i24.4208
Published online Dec 26, 2019. doi: 10.12998/wjcc.v7.i24.4208
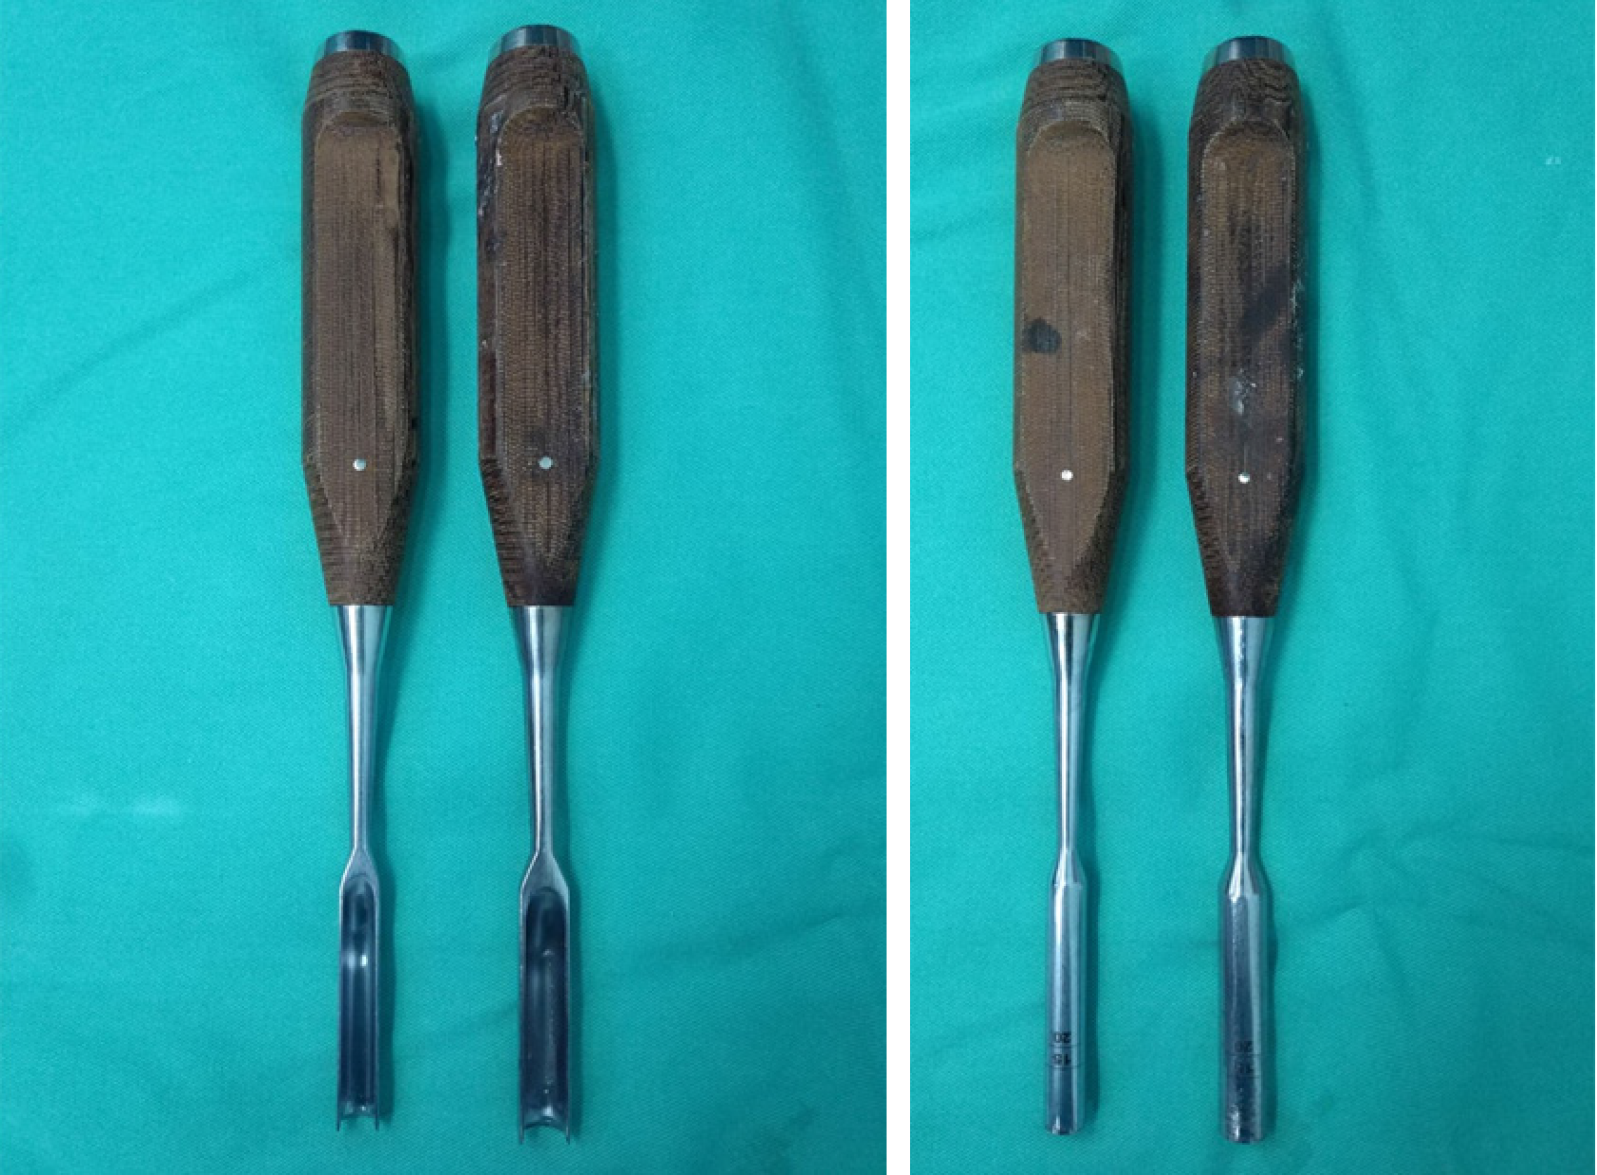
Figure 1 Posterior cruciate ligament protectors applied during surgery.
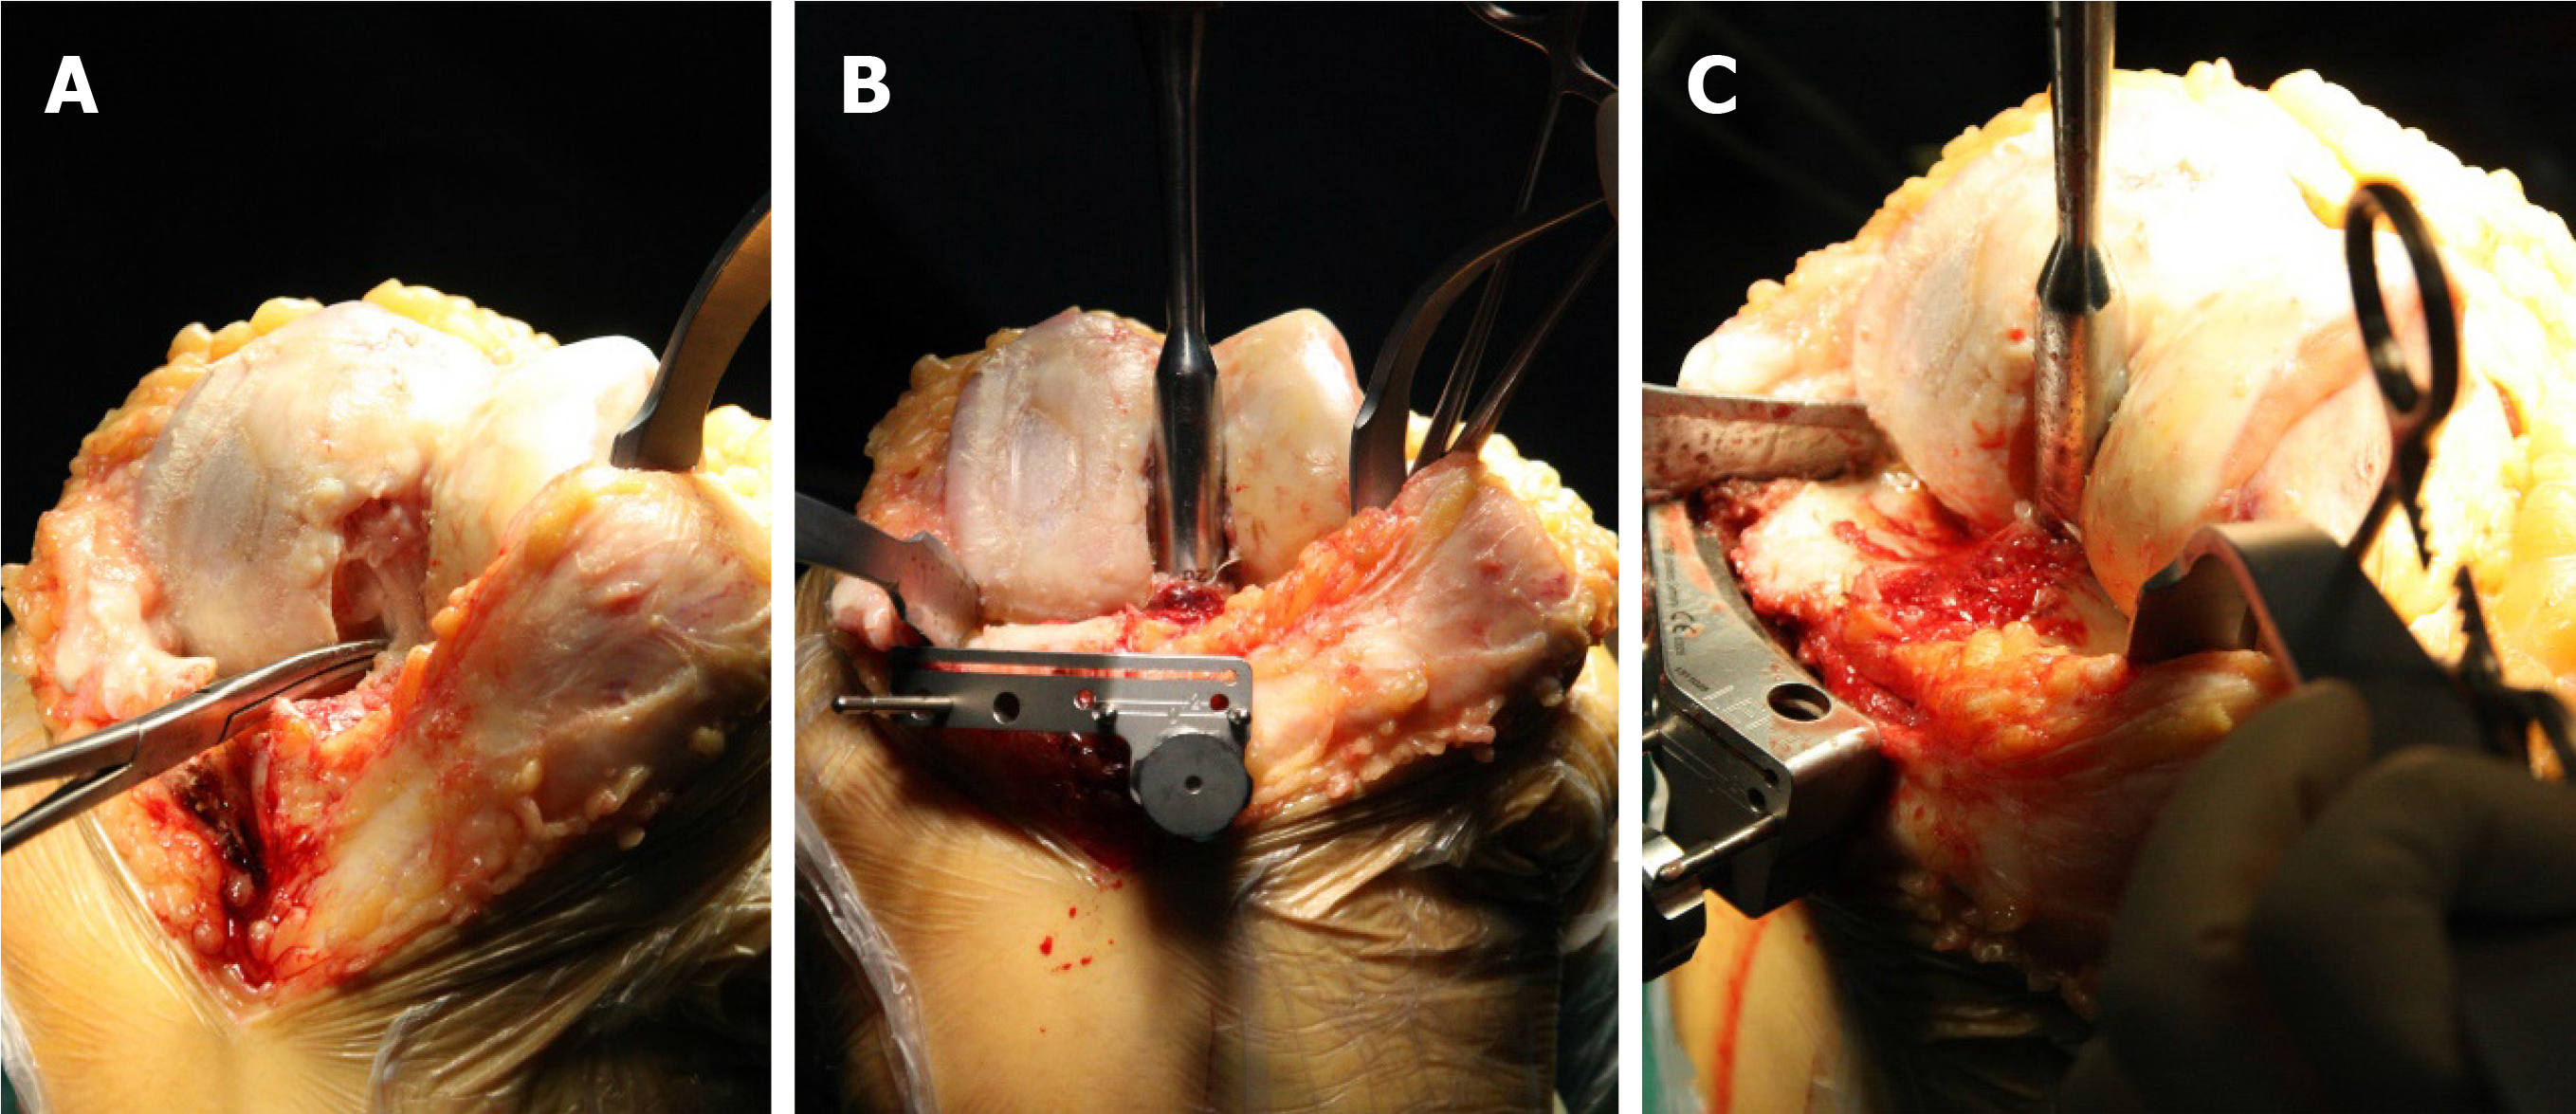
Figure 2 Insertion of the posterior cruciate ligament protector.
A: Exposure of the posterior cruciate ligament (PCL); B: The protector was inserted around the PCL; C: Enough depth was necessary to protect the intact bone block of the PCL.
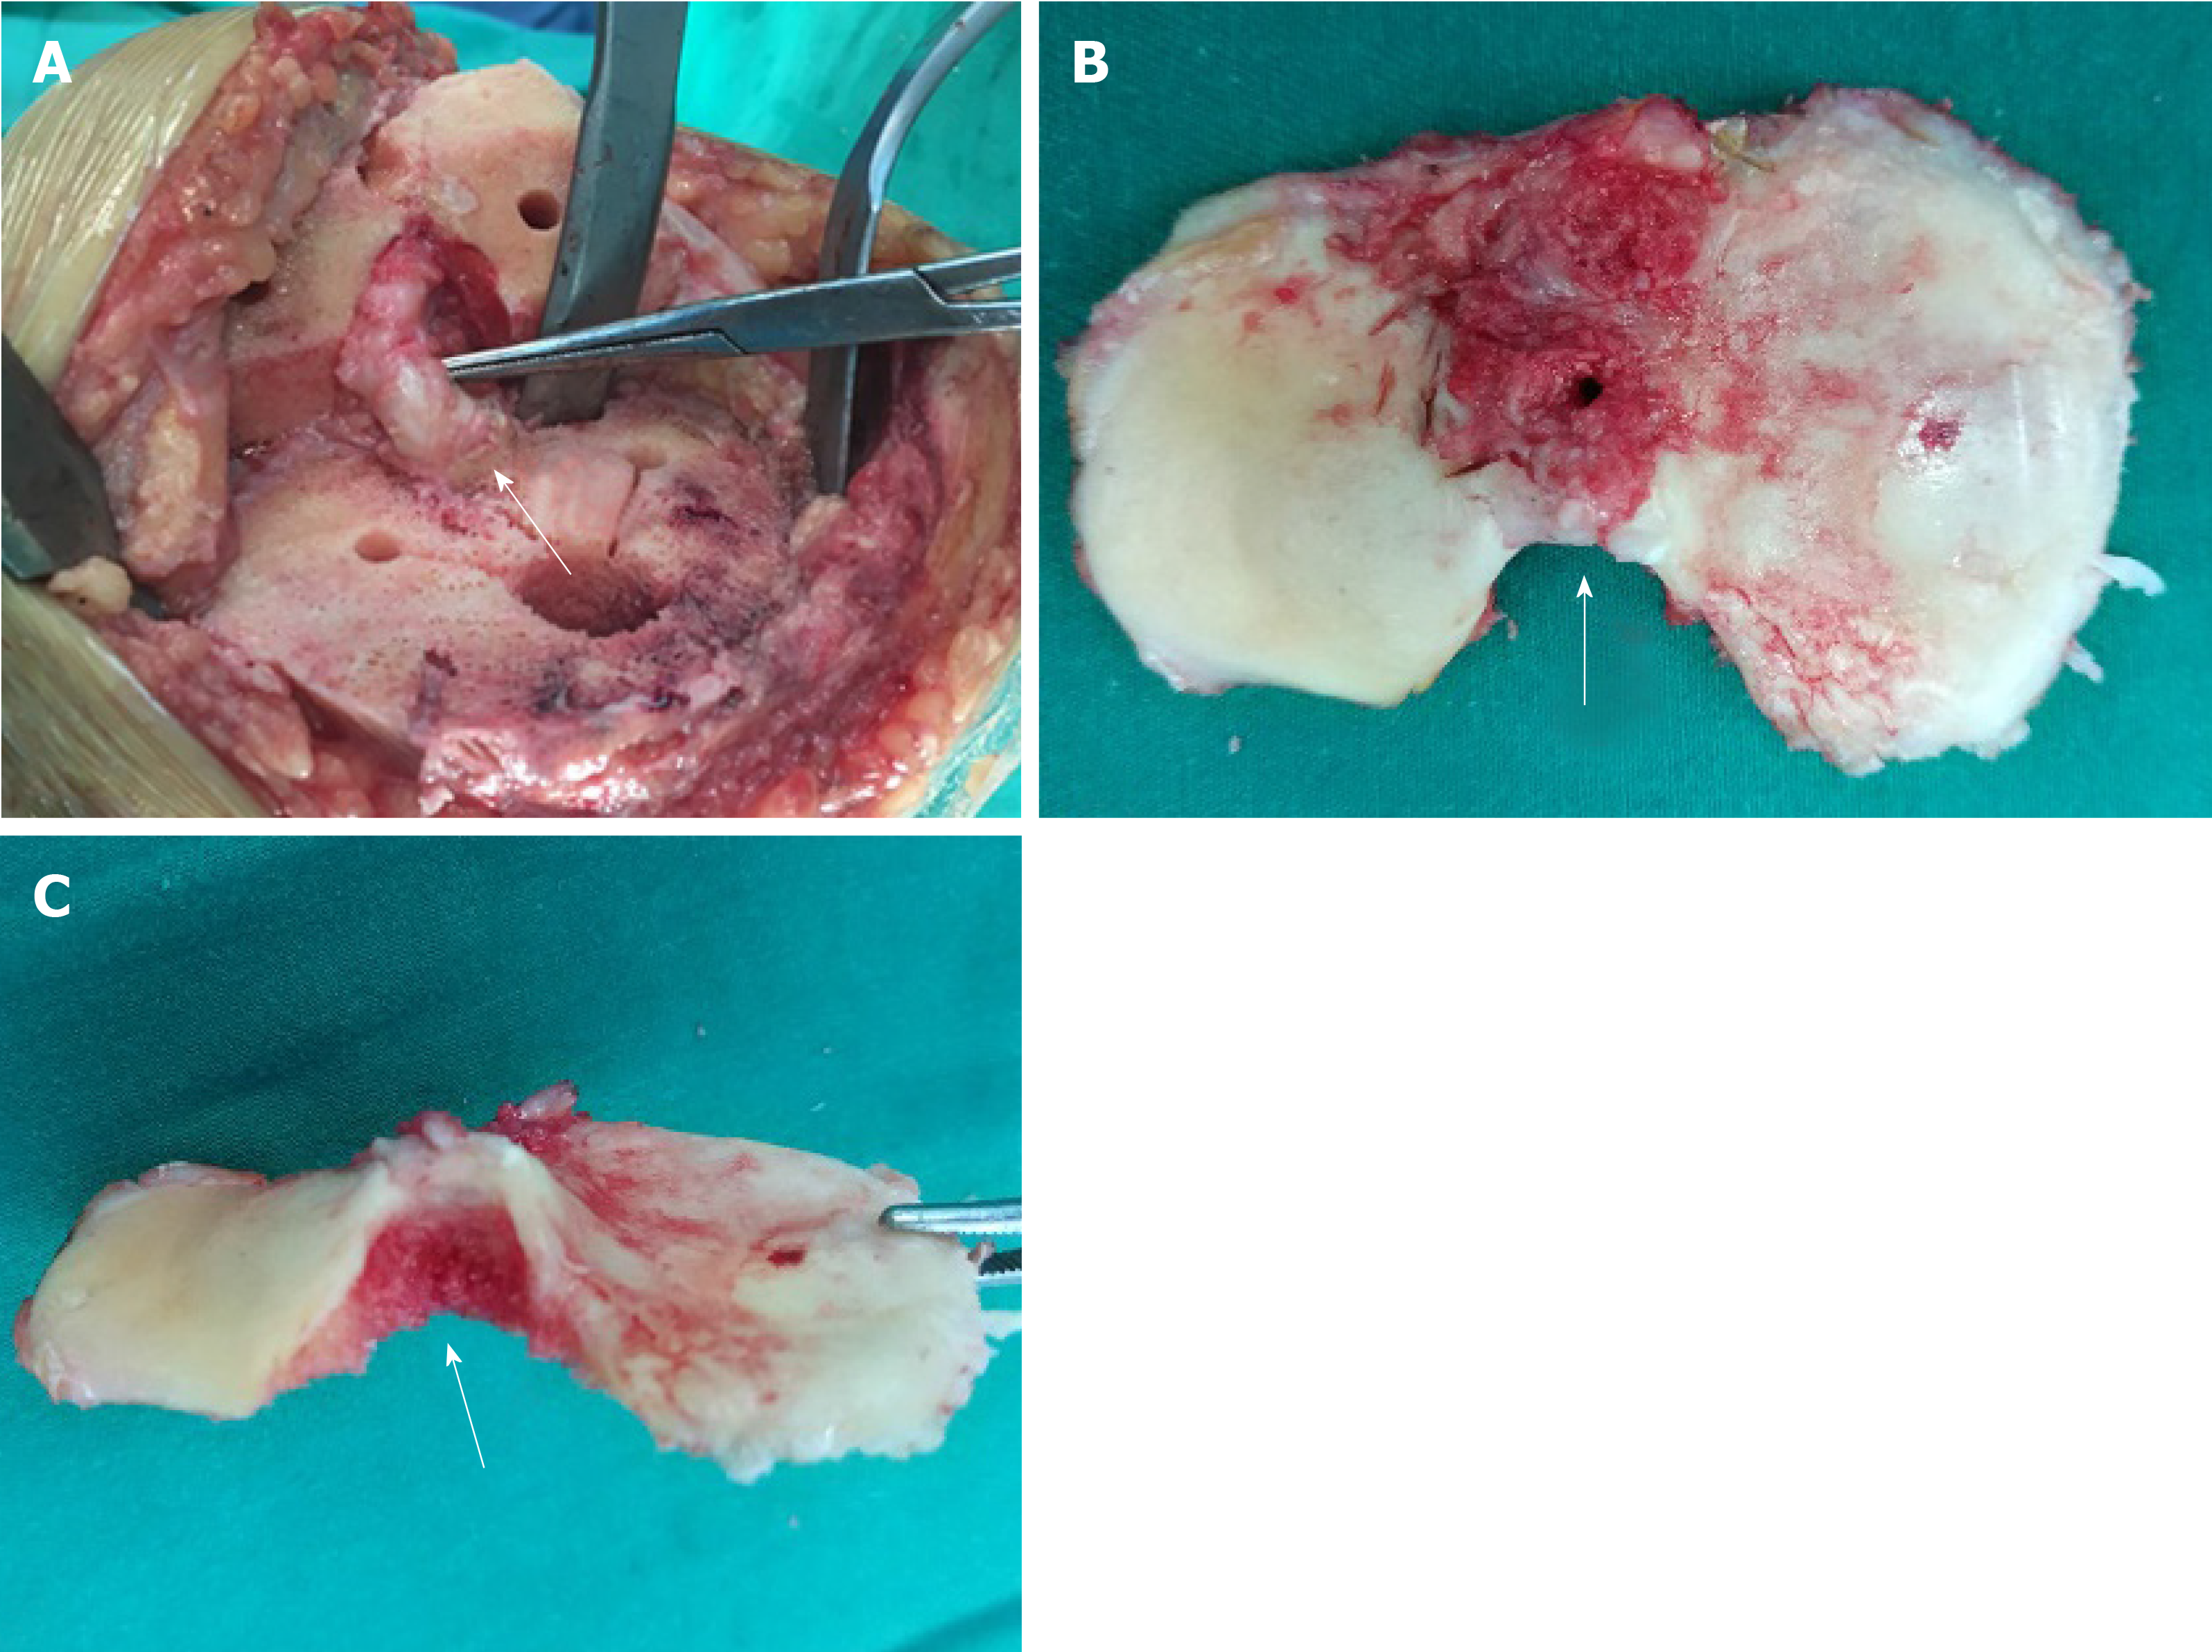
Figure 3 Intraoperative photographs.
A: Preserved bone block at the tibial attachment of the posterior cruciate ligament (arrow); B, C: The resected tibial plateau showing the shape of the intact posterior cruciate ligament bone block at the tibial attachment (arrows).
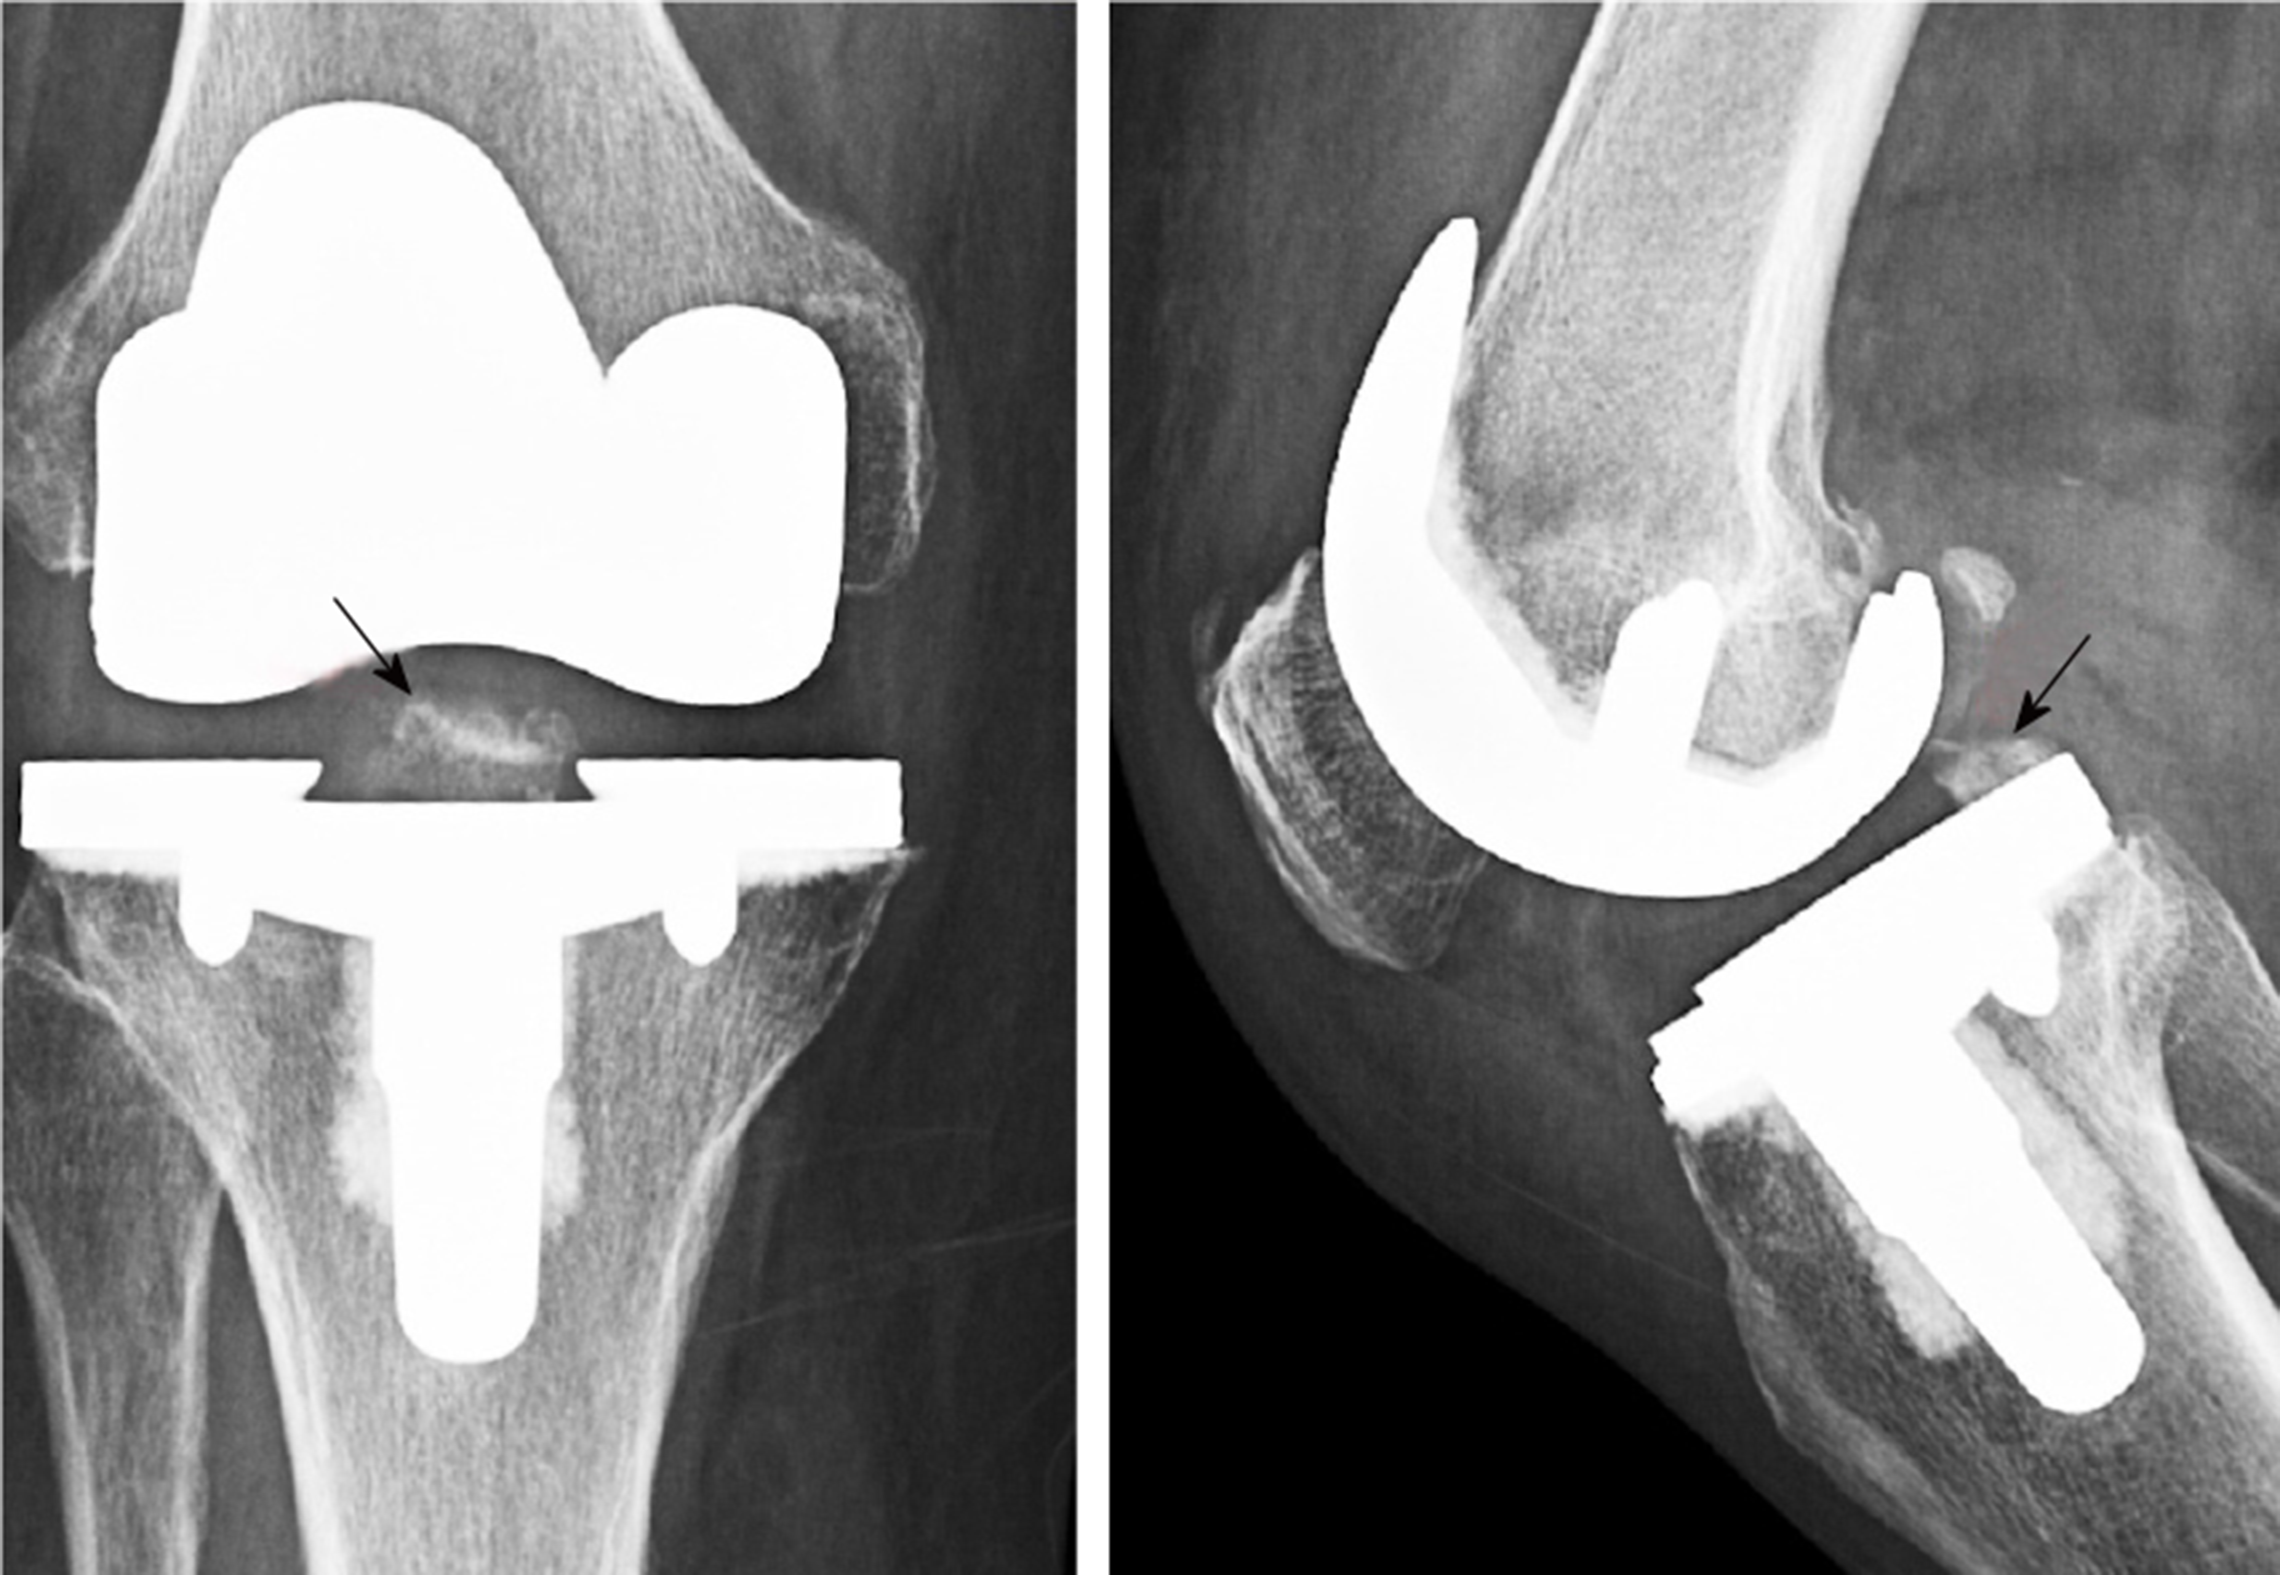
Figure 4 Radiograph after total knee arthroplasty showing the intact posterior cruciate ligament bone block at the tibial attachment (arrows).
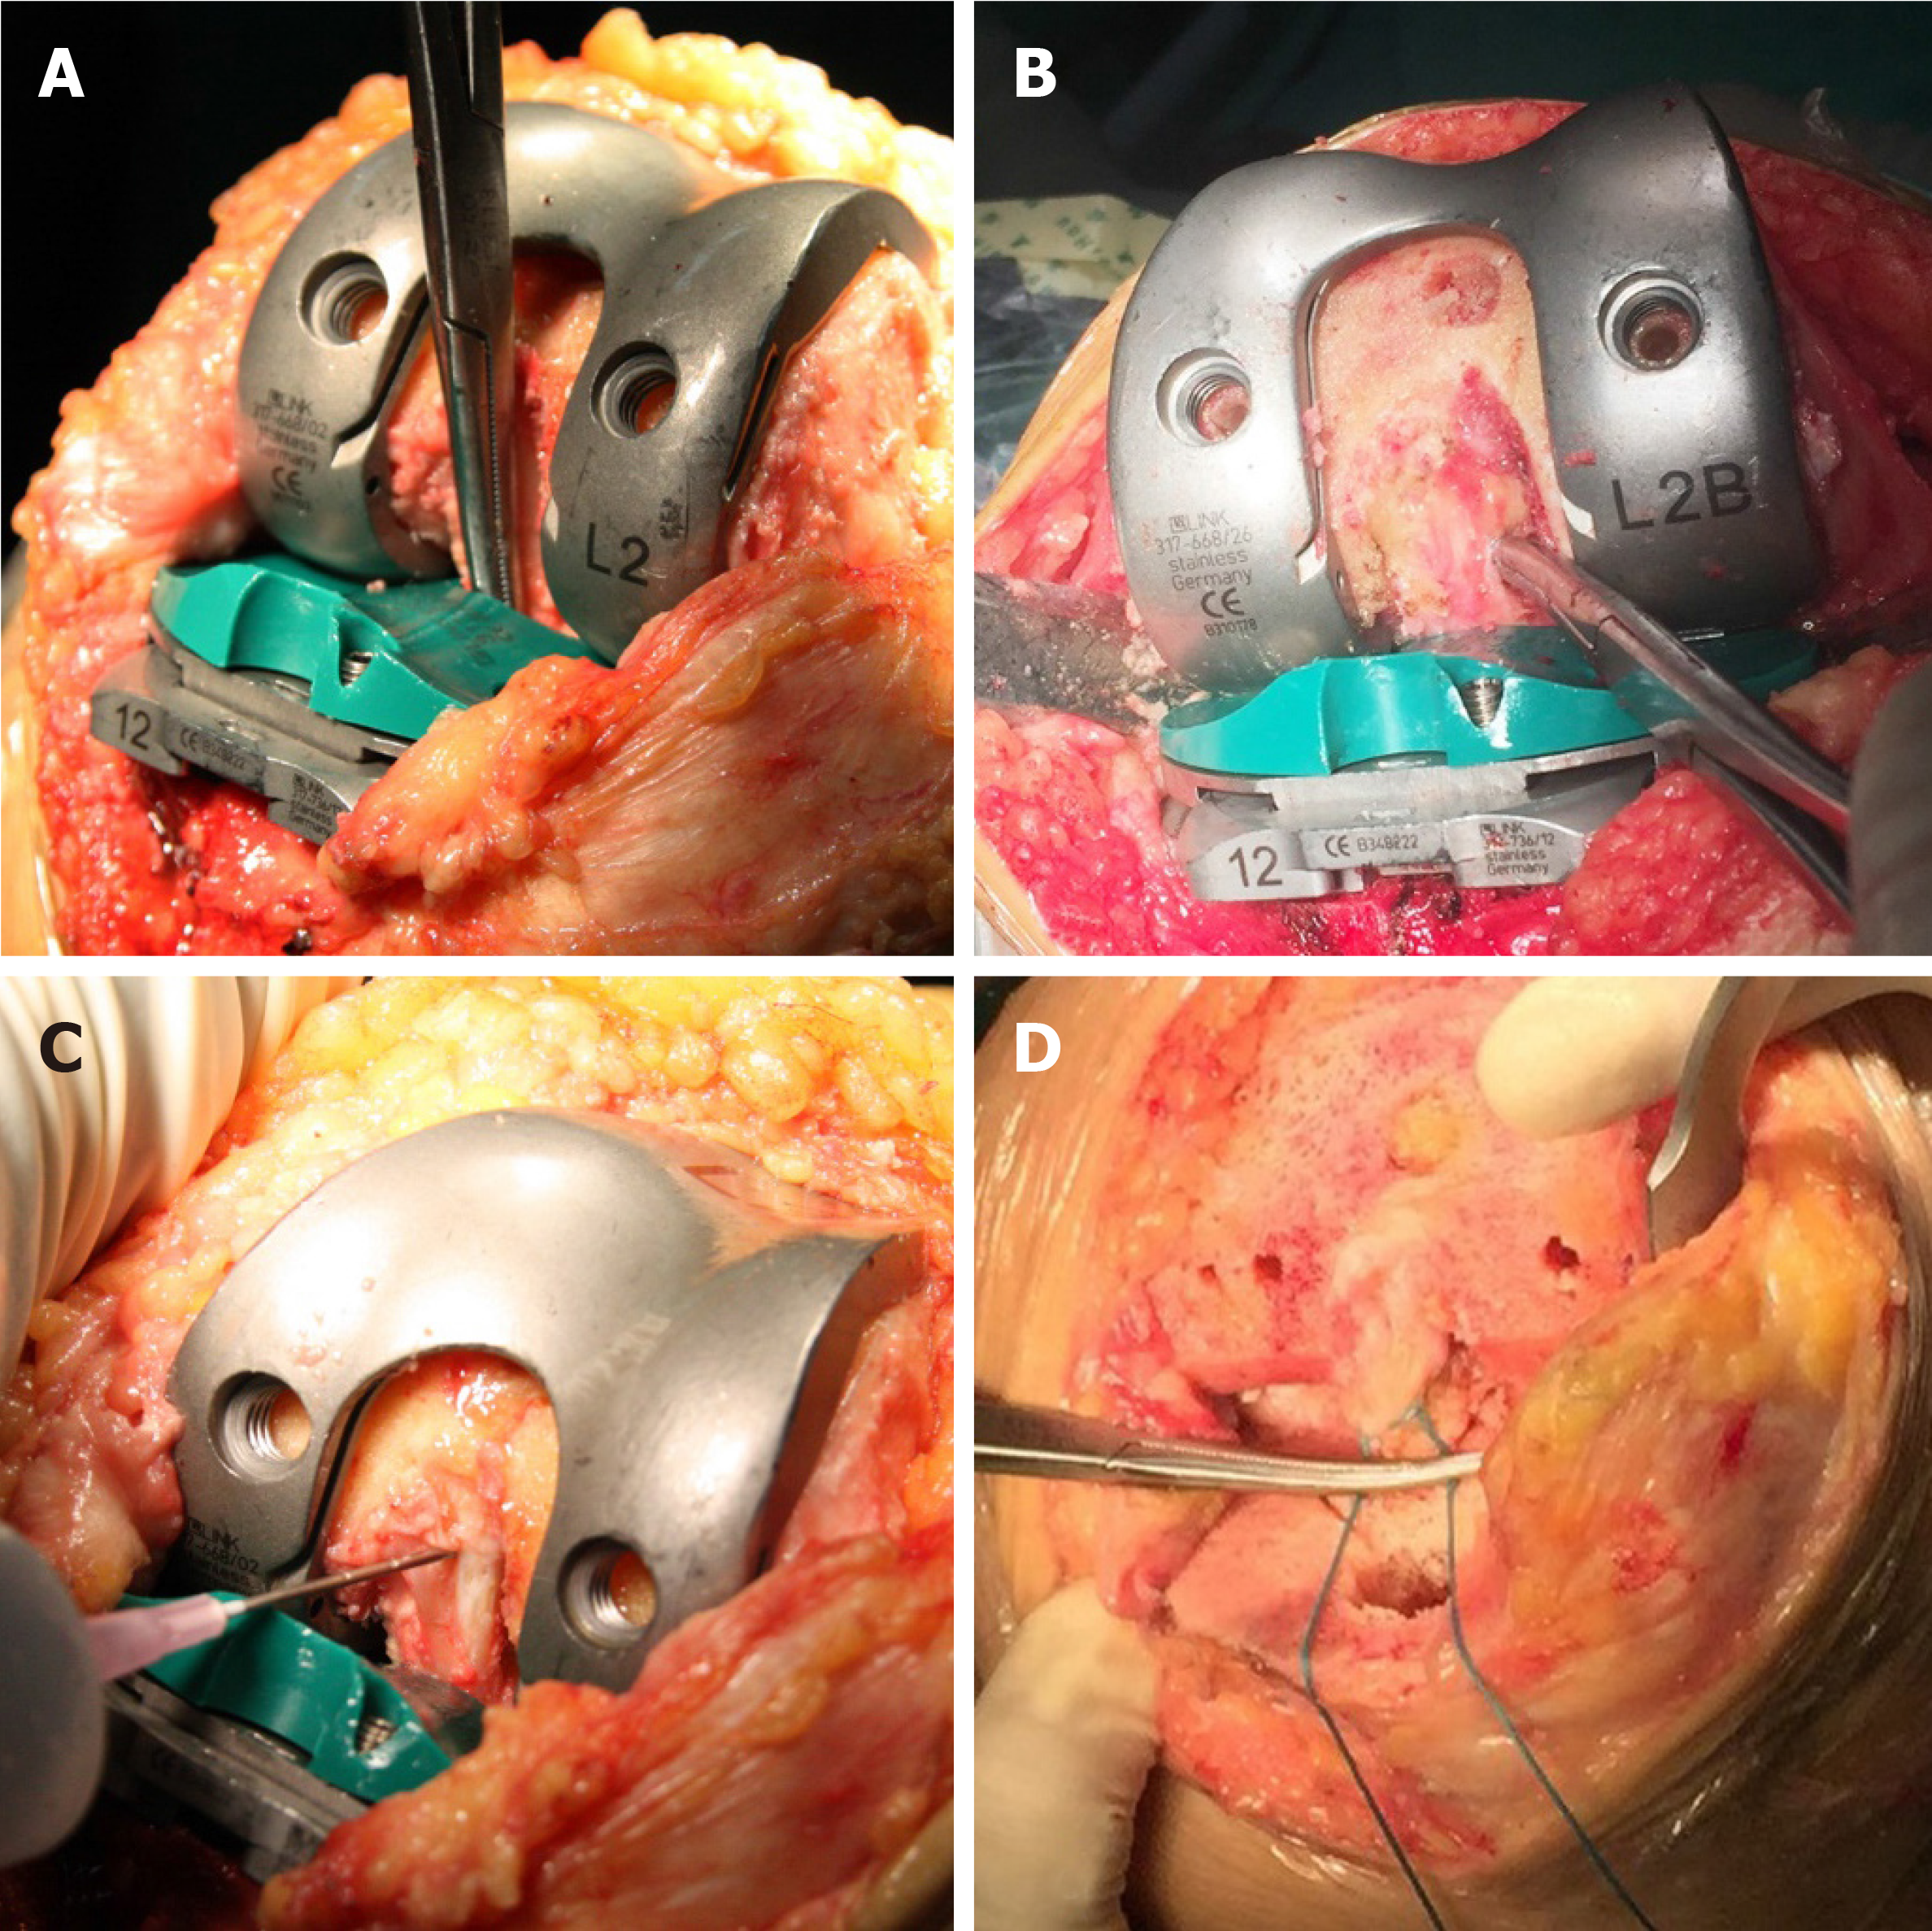
Figure 5 Intraoperative photographs showing the assessment of the posterior cruciate ligament.
A: To check that the posterior cruciate ligament (PCL) was not entrapped by the trial implant; B: To check the tension of the PCL at 90°of flexion with the trial implant; C: Releasing the PCL with the pie-crusting technique to obtain an appropriate tension of the PCL, especially the anterolateral bundle at the femoral side; D: A tendon suture was used to repair the detachment of the PCL bone block from the tibia. The suture could be tightened to adjust the tension of the PCL. The suture was fixed under the tibial component by cement.
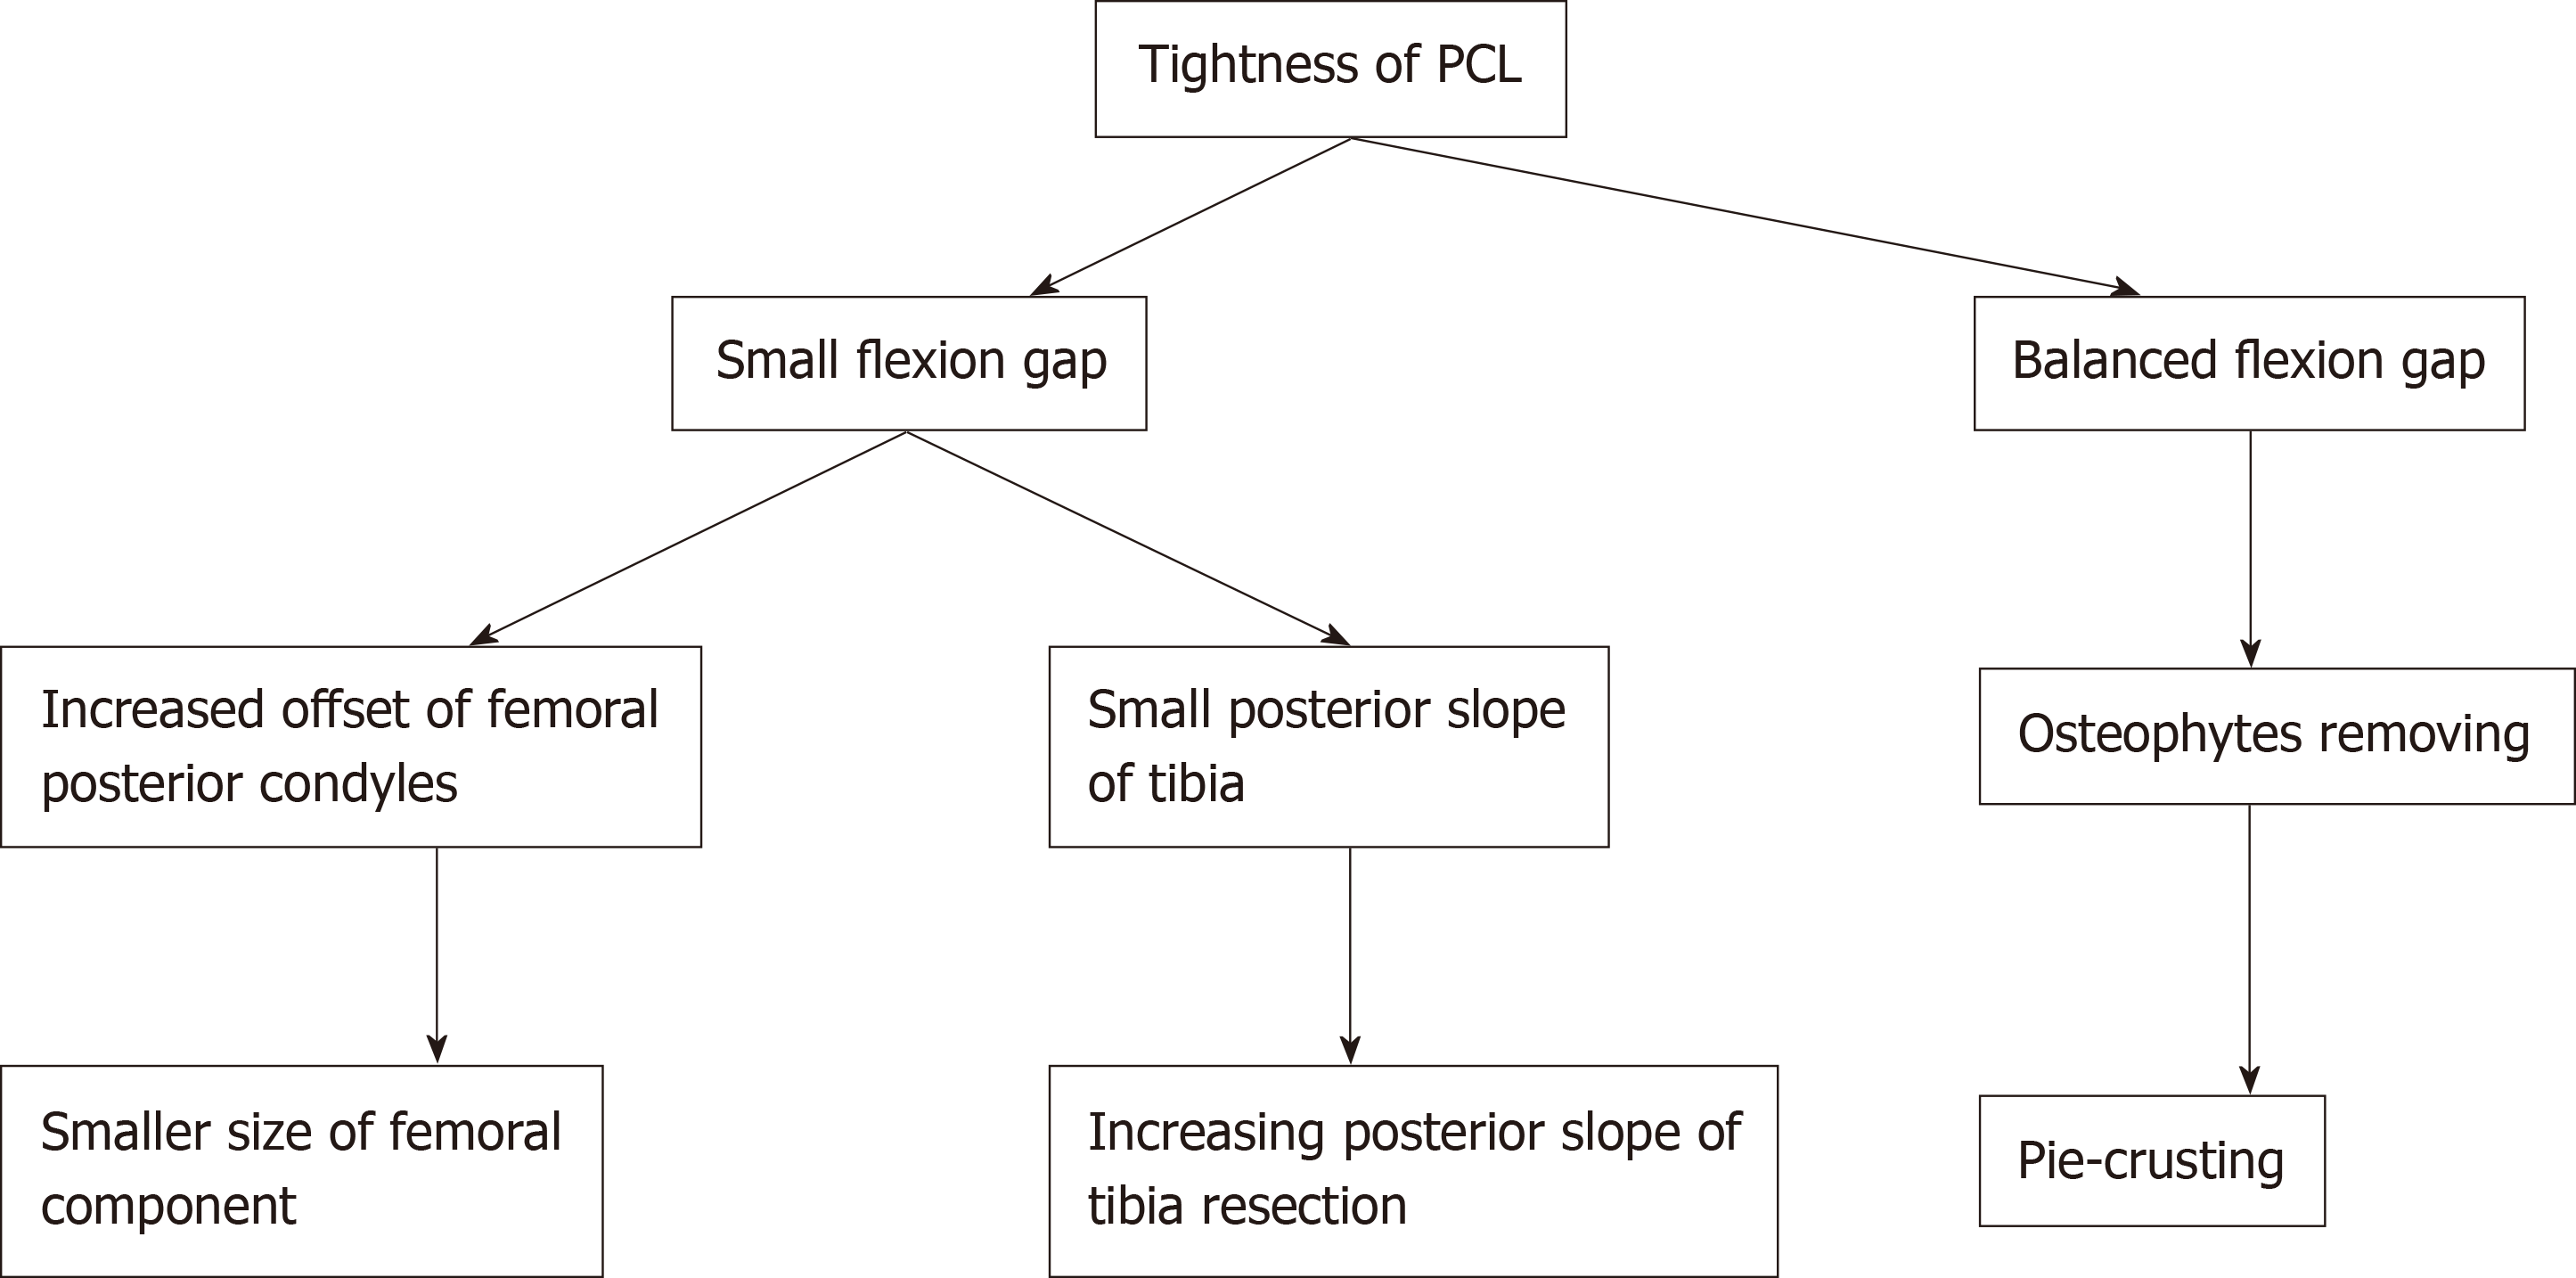
Figure 6 Strategy for a tight posterior cruciate ligament in cruciate-retaining total knee arthroplasty.
PCL: Posterior cruciate ligament.
- Citation: Ma DS, Wen L, Wang ZW, Zhang B, Ren SX, Lin Y. Intact, pie-crusting and repairing the posterior cruciate ligament in posterior cruciate ligament-retaining total knee arthroplasty: A 5-year follow-up. World J Clin Cases 2019; 7(24): 4208-4217
- URL: https://www.wjgnet.com/2307-8960/full/v7/i24/4208.htm
- DOI: https://dx.doi.org/10.12998/wjcc.v7.i24.4208


